UPDATE: It has been almost a year and half since I painted the trim on our main floor and banister, the rest of the house has been at least a year as well. It is holding up extremely well considering we have 4 kids and 2 dogs.
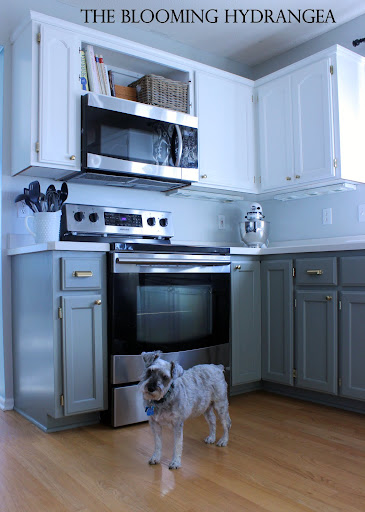
I have also painted our kitchen cabinets with the same method after a failure using the Rustoleum Cabinet Transformations kit, you can check out more on the kitchen here.
So I’ve received a few questions on how I painted my trim, what paint did I use, etc. and thought I’d type up a blog post on it for you to reference.
First off I purchased some Fast Prime 2 by from our Menards store. It says you can paint over glossy wood trim surfaces etc. without sanding. For some reason I can’t find it on the Zinsser website but here is what my can looks like and I just purchased this in June of 2011. Don’t judge my painting skills by the looks of my cans, I am messy but I get the job done and I have never figured out a good trick to pouring paint out of the can without getting the can all covered.
When painting, one of the most important tools is your paintbrush. I used the which was really helpful for getting into the corners, hard to reach spaces and stair spindles. My other brush is a and I can’t remember the name of mine at the moment but there are a variety to choose from and the paint professional at your paint store should be able to help you select the proper brush.
I primed the trim and did two coats, letting it dry for at least 24 hours between coats even though I think it said you could re-coat in less time. I then found while looking up painting oak trim, Jenny inspired me to try the
I painted two coats of the over the primer, making sure they had at least 24 hours in between coats. So far so good, I have four children and two dogs and the trim hasn’t been nicked or scratched, yet.
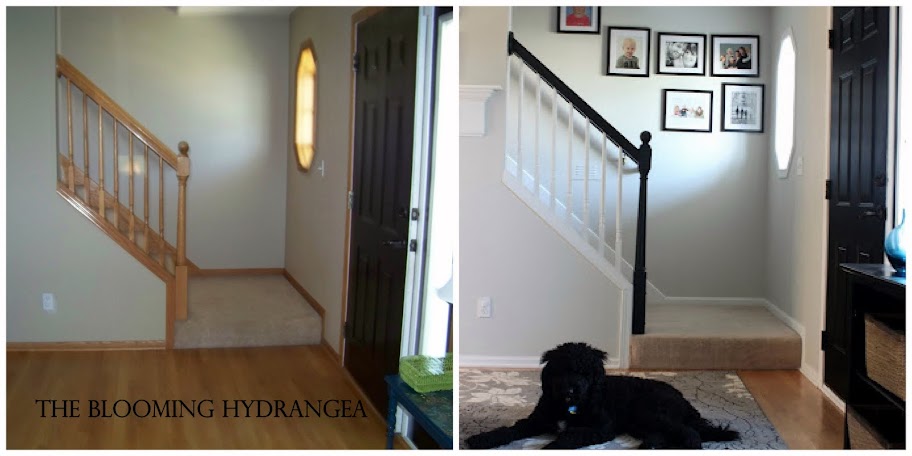
I also used the on my banisters in black and that so far is holding up well. I did sand the top of the banister and the ball on the post a bit because I knew they would take a beating. If I’m roughing up a piece for painting I use 100 grit or what would be considered a medium grit. I also sanded between coats of primer on the banister handrail area because it felt kind of rough and yucky. When sanding between coats I usually use a fine grit paper, usually 220 or higher. This time I used a and it was great for sanding around the spindles on the stairs. The trim I did not sand and it felt fine.
So there you have it, my trim painting process. I think that Jenny at does a great job explaining this process as well. If you have any more questions, I’d be happy to answer them for you. If you do paint your trim white, I’d love to see it, so send me a link or pictures!
Disclaimer: This is the process and also the products I used, I am not a professional painter and you may not achieve the same results using the method that I used. I also was not paid or compensated in any way by ACE, Zinsser, Purdy or 3M for mentioning their products in my post.
Thanks for the helpful tips!
Thanks for the info! I’m going to paint my ugly kitchen cabinets and I have a feeling that’s going to lead to painting my woodwork as well. Sounds easy enough. I love the no sanding part!!!
For a buck or two, I buy these covers to make pouring easier and less messy. They work very well!
Also, I like your info on painting trim. I’ve always wanted to do that with the wood trim in the house.
Lovely! I would like to do something similar. I am curious, almost two years later, if it is still holding up well? We have A LOT of trim because of how our upstairs and staircase is laid out. It’s going to be a lot of work, but worth it, OAK is just so.. Oak.
Thanks for sharing. I have a lot of oak trim that I want to paint too. Did you remove your baseboards to paint them? If not, do you have any tips for keeping the paint off the walls and floors?
I am curious too…how is it holding up now? Still looks good or should you have sanded first?